- Blog
#Azure
How to plan your Azure budget for 2025-2026 with FinOps
- 11/12/2024
Reading time 5 minutes
Have you grown tired of clicking things in the Azure DevOps portal and having to make changes to each environment individually? I know I have, but thankfully I have a solution! In this post, we’re going to learn what Azure Pipelines YAML is, why should you use it and how to get started with creating your build pipelines with it.
Until quite recently, Microsoft’s own DevOps product – Azure DevOps – has been promoting the use of build and release pipelines created with the “Classic” style user interface. Whenever you look at any of their presentations, that is the only thing you’ll see.
While they do make the functionality of the service quite easy to grasp, they come with major inconveniences that pop up once your environment gets more complex. Copying pipelines to another project is a hassle, creating templates for recurring use is needlessly complicated and if you have multiple app environments, you will need to replicate your changes by hand multiple times, especially if your releases are using a separate branch from your dev environment.
Competitors have had solutions to these issues for quite some time, and now Microsoft’s response – YAML based pipelines – has almost reached feature parity with the GUI based approach. I feel that it’s finally worth learning the ins and outs of the new standard. So what exactly are they?
Put simply, they are your pipeline logic stored as code in your repository. Just like the rise of Infrastructure as Code, the next step in complete portability and packaging your product is having the deployment logic shipped with the repository itself. This also opens up so many more possibilities in how you manage your workflow and standardization in your company.
In my opinion, the three biggest benefits of using YAML for pipelines:
There are some drawbacks to this approach though. As with learning any new technology, building with YAML will take some more work than just doing the same thing with Classic pipelines. The two are not yet equal in their features either, and especially in more complex situations, you notice that some features (like pre/post-deployment gates) are missing. On top of that, this extra amount of work will need to be justified to the customer, and they need to understand the benefits in the long run, which more often than not outweigh the initial cost by a large margin.
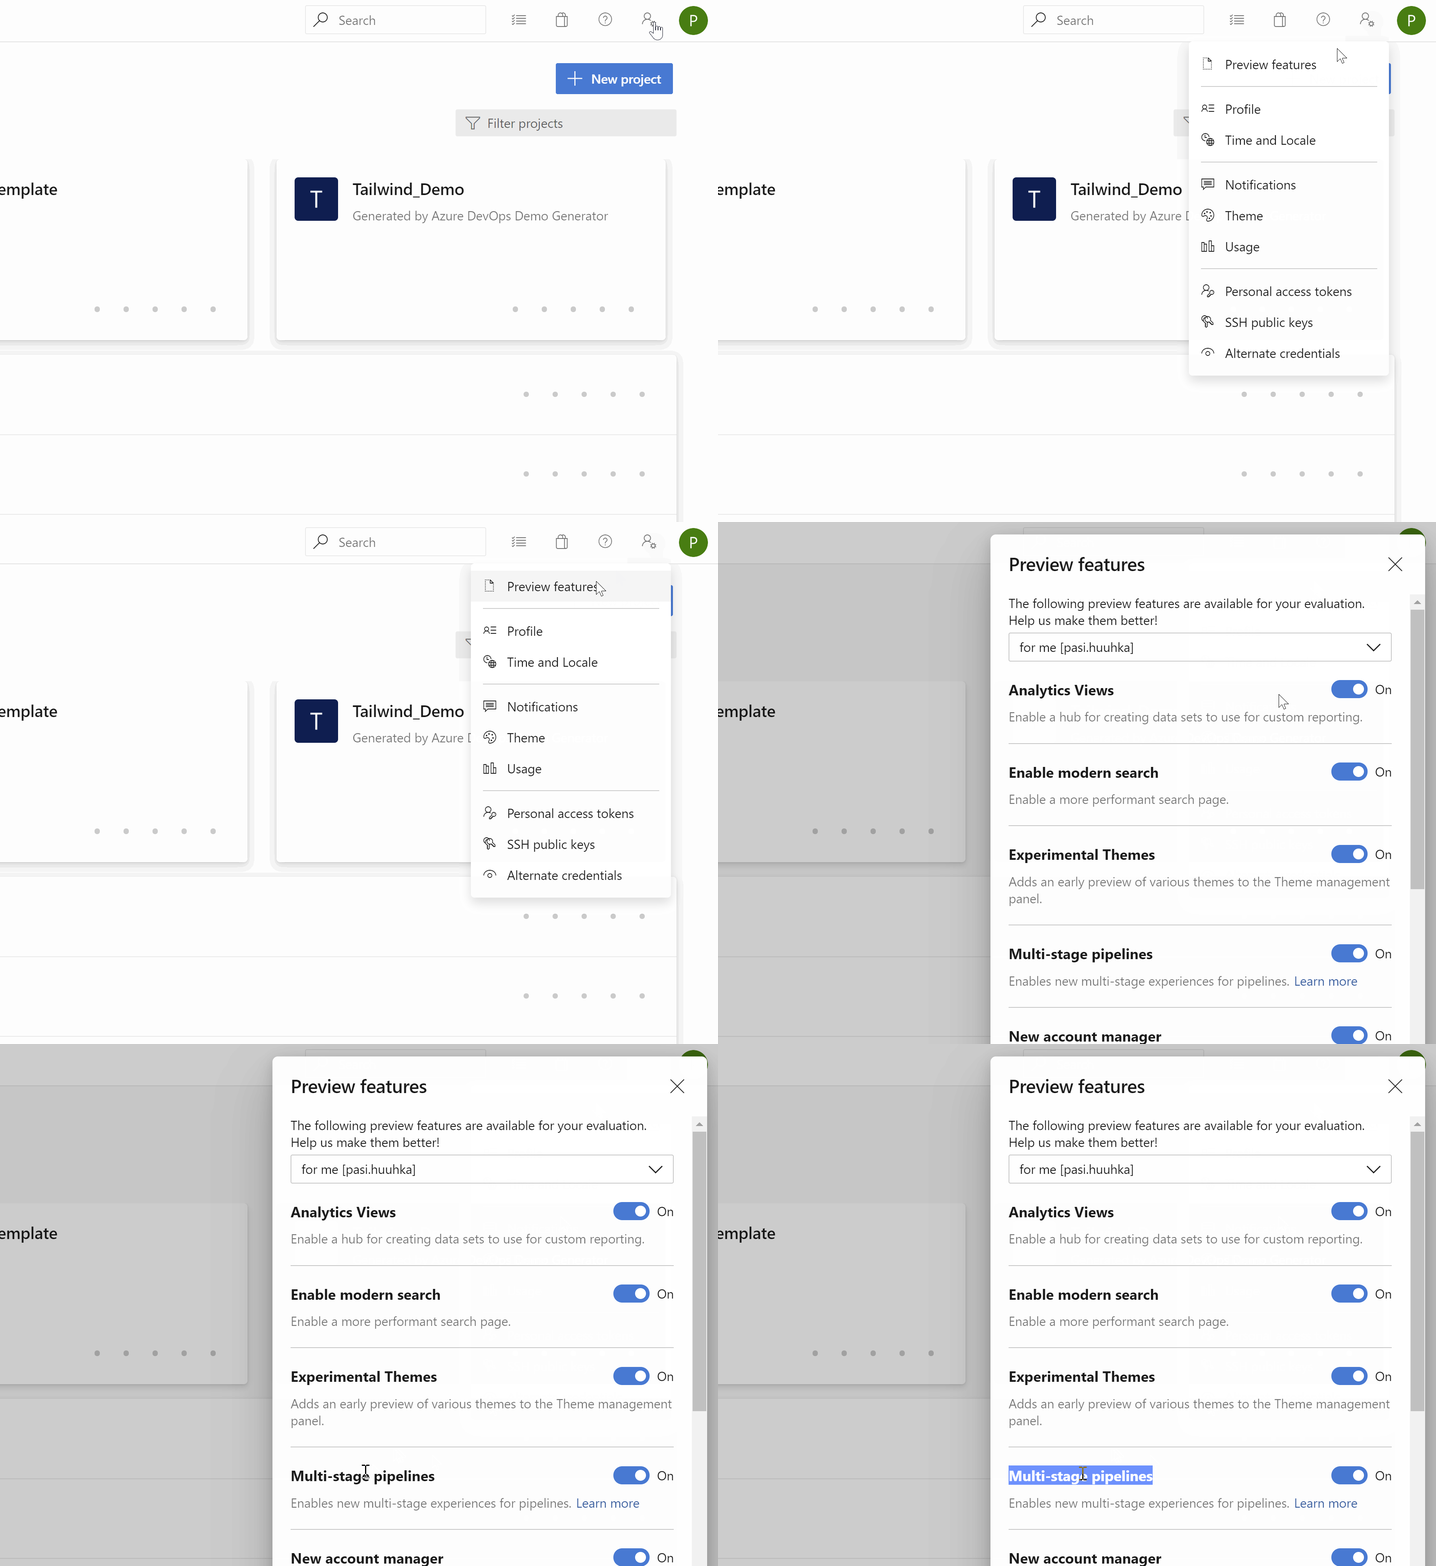
Currently, the only option out of the box is creating build pipelines with YAML with only one stage, and that is what this blog post will focus on. To enable more complex pipelines to use for releases, you can turn on the “Multi-stage pipelines” preview feature. I’d recommend you enable this feature, as it is very near being changed to an opt-out flag.
On the surface, the YAML pipeline structure does not differ much from its’ Classic counterpart:
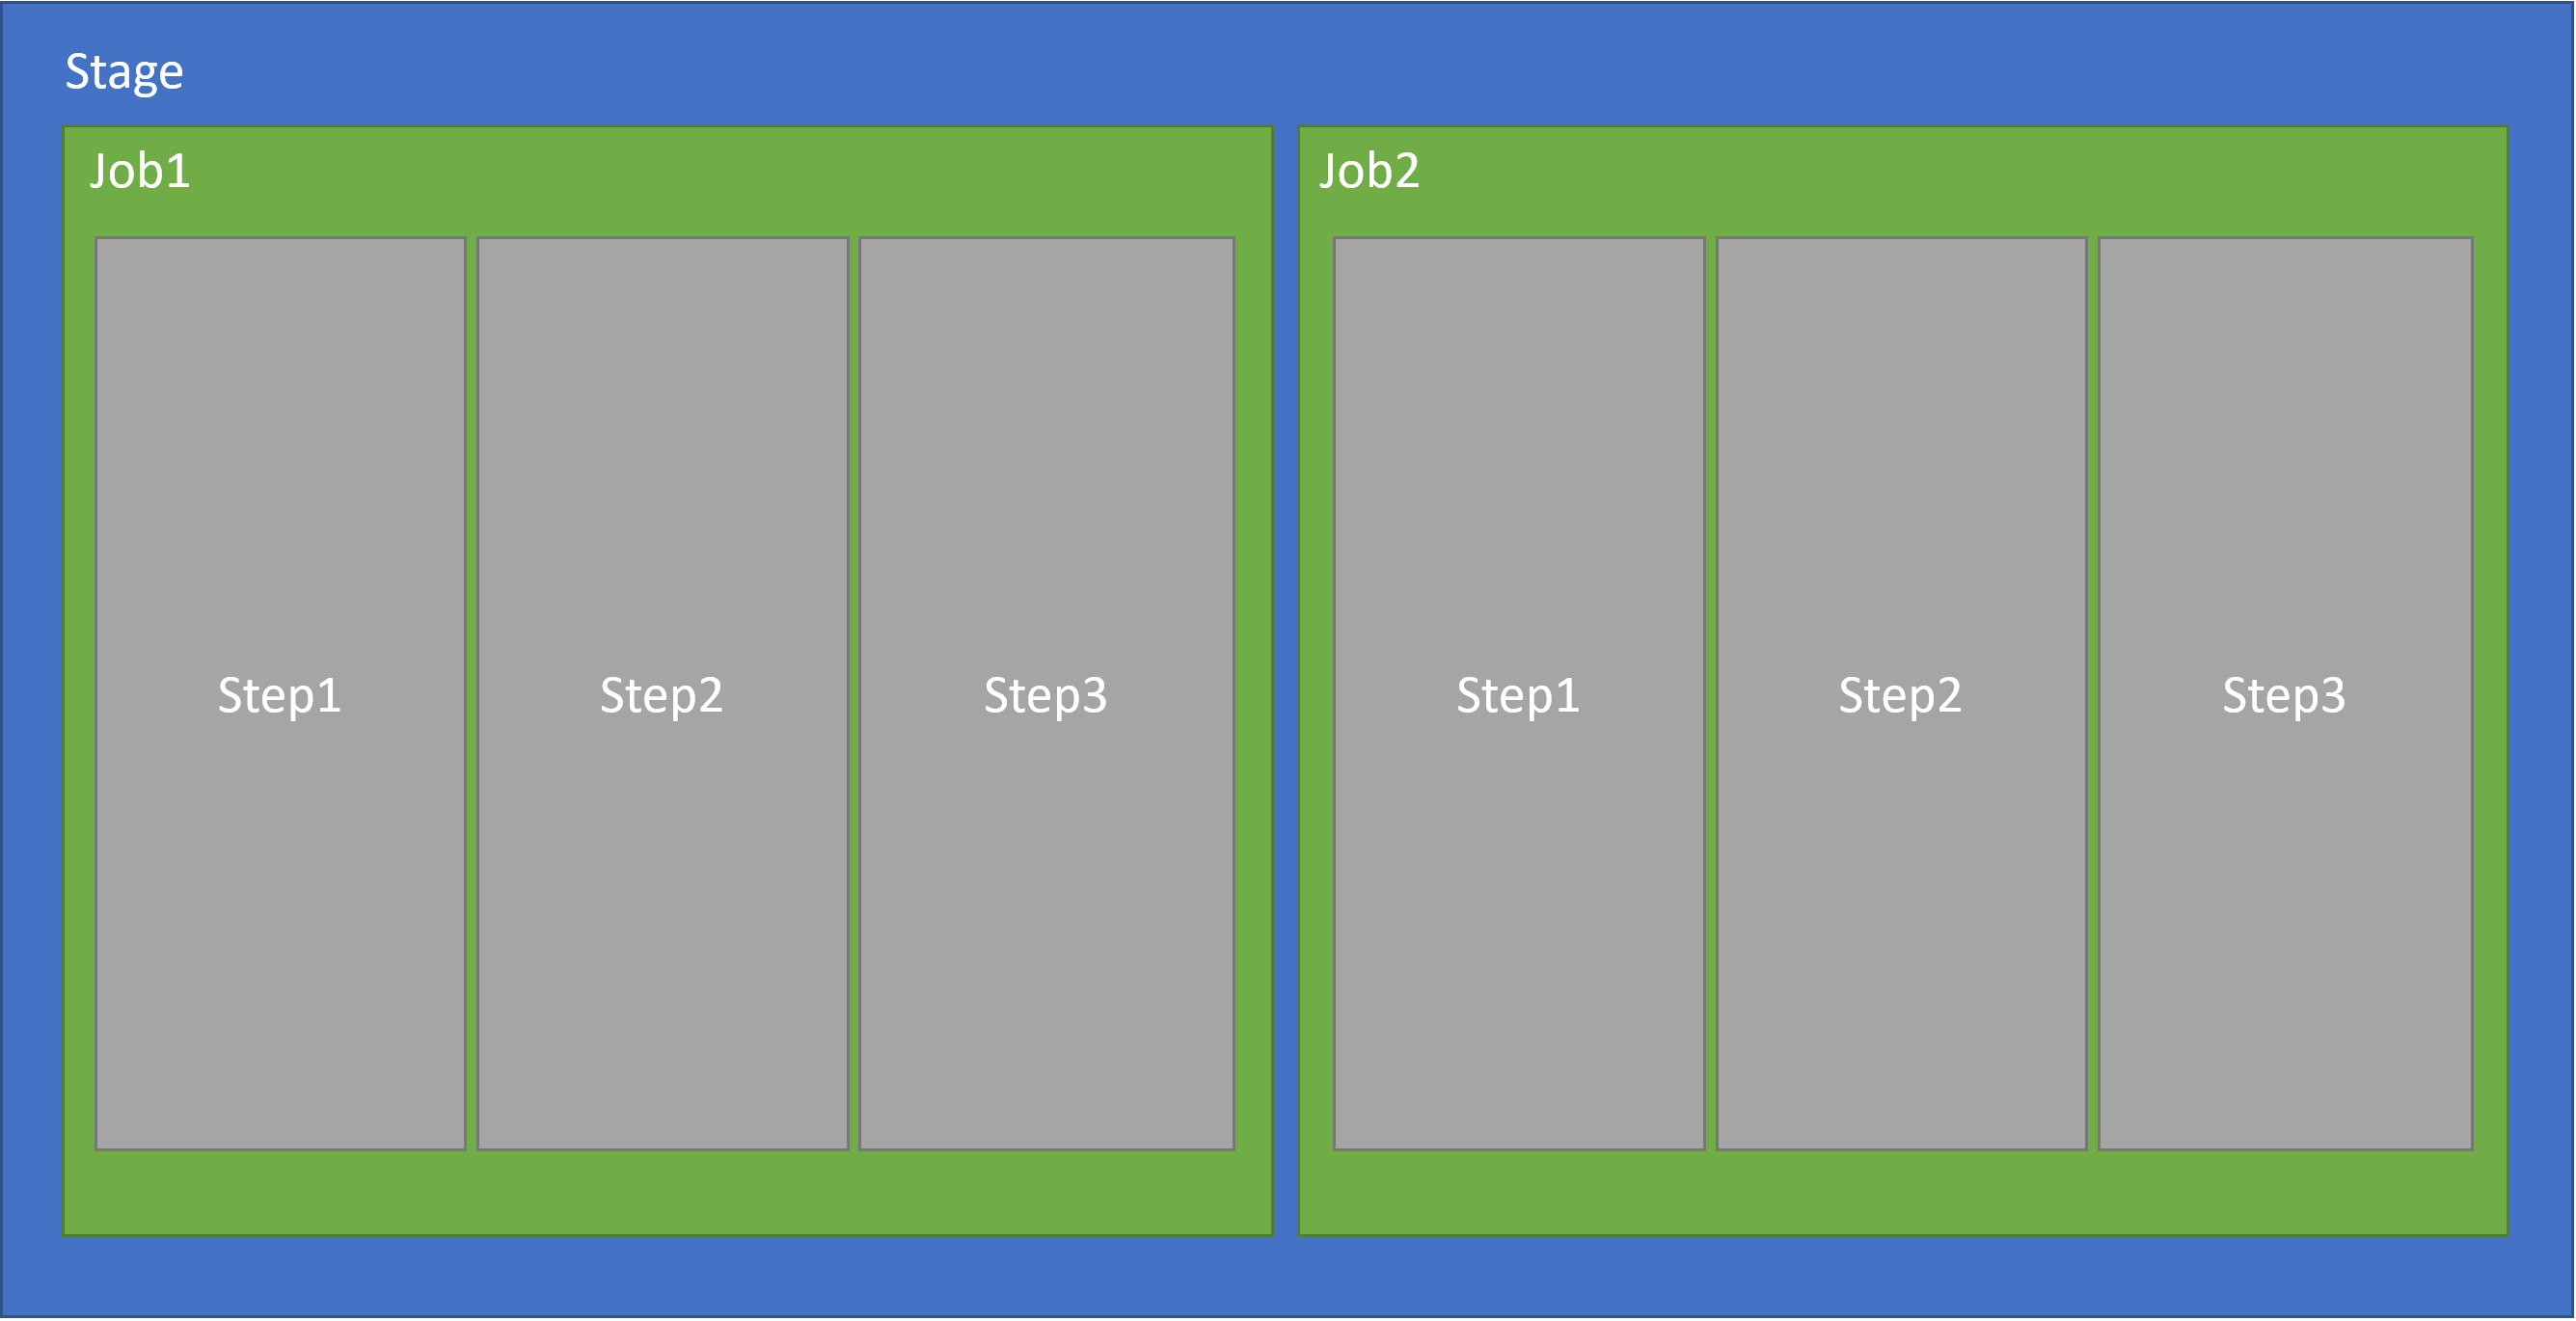
In a YAML file, a basic pipeline would look something like this:
trigger:
- master

stages:
- stage: stage1
  jobs:
  - job: job1
    pool:
      vmImage: 'windows-latest'
    steps:
    - task: NuGetToolInstaller@1
    - task: NuGetCommand@2
      inputs:
        restoreSolution: 'mysolution.sln'
    - script: echo Hello, world!
      displayName: 'Run a one-line script'

- stage: stage2
  jobs:
  - job: importantjob
    pool:
      vmImage: 'windows-latest'
    steps:
      - pwsh: 'write-output "I do nothing"'
All of these can also be references to a template, with parameters.
Template caller:
trigger:
- master

stages:
- template: template-stage.yaml
  parameters:
    stagename: 'MyStage1'
    vmImage: 'windows-latest'
    restoreSolution: 'mysolution.sln'
Template content:
parameters:
  stageName: ''       # should fail if not given
  vmImage: 'windows-2019'  # default values if not given in caller
  restoreSolution: ''

stages:
- stage: ${{ parameters.stageName }}
  pool:
    vmImage: ${{ parameters.vmImage }}
  jobs:
  - job: job1
    steps:
    - task: NuGetToolInstaller@1
    - task: NuGetCommand@2
      inputs:
        restoreSolution: '${{ parameters.restoreSolution }}'
    - script: echo Hello, world!
      displayName: 'Run a one-line script'
Not all of these are required for a functioning template. The minimum you can work with is a simple list of steps. Once you get further in studying the different levels in use, be sure to check the documentation for each building block.
Luckily, Microsoft has provided us with a somewhat confusing pile of documentation we can utilize, along with some starter templates we can use as a base. They also have created an extension for VSCode that you can use, but the best way is still to use the Azure DevOps portal, as it has a very useful task assistant tool to create the individual step configurations. This makes it especially easy to learn the syntax.
Here’s a short example of how to create your first pipeline.
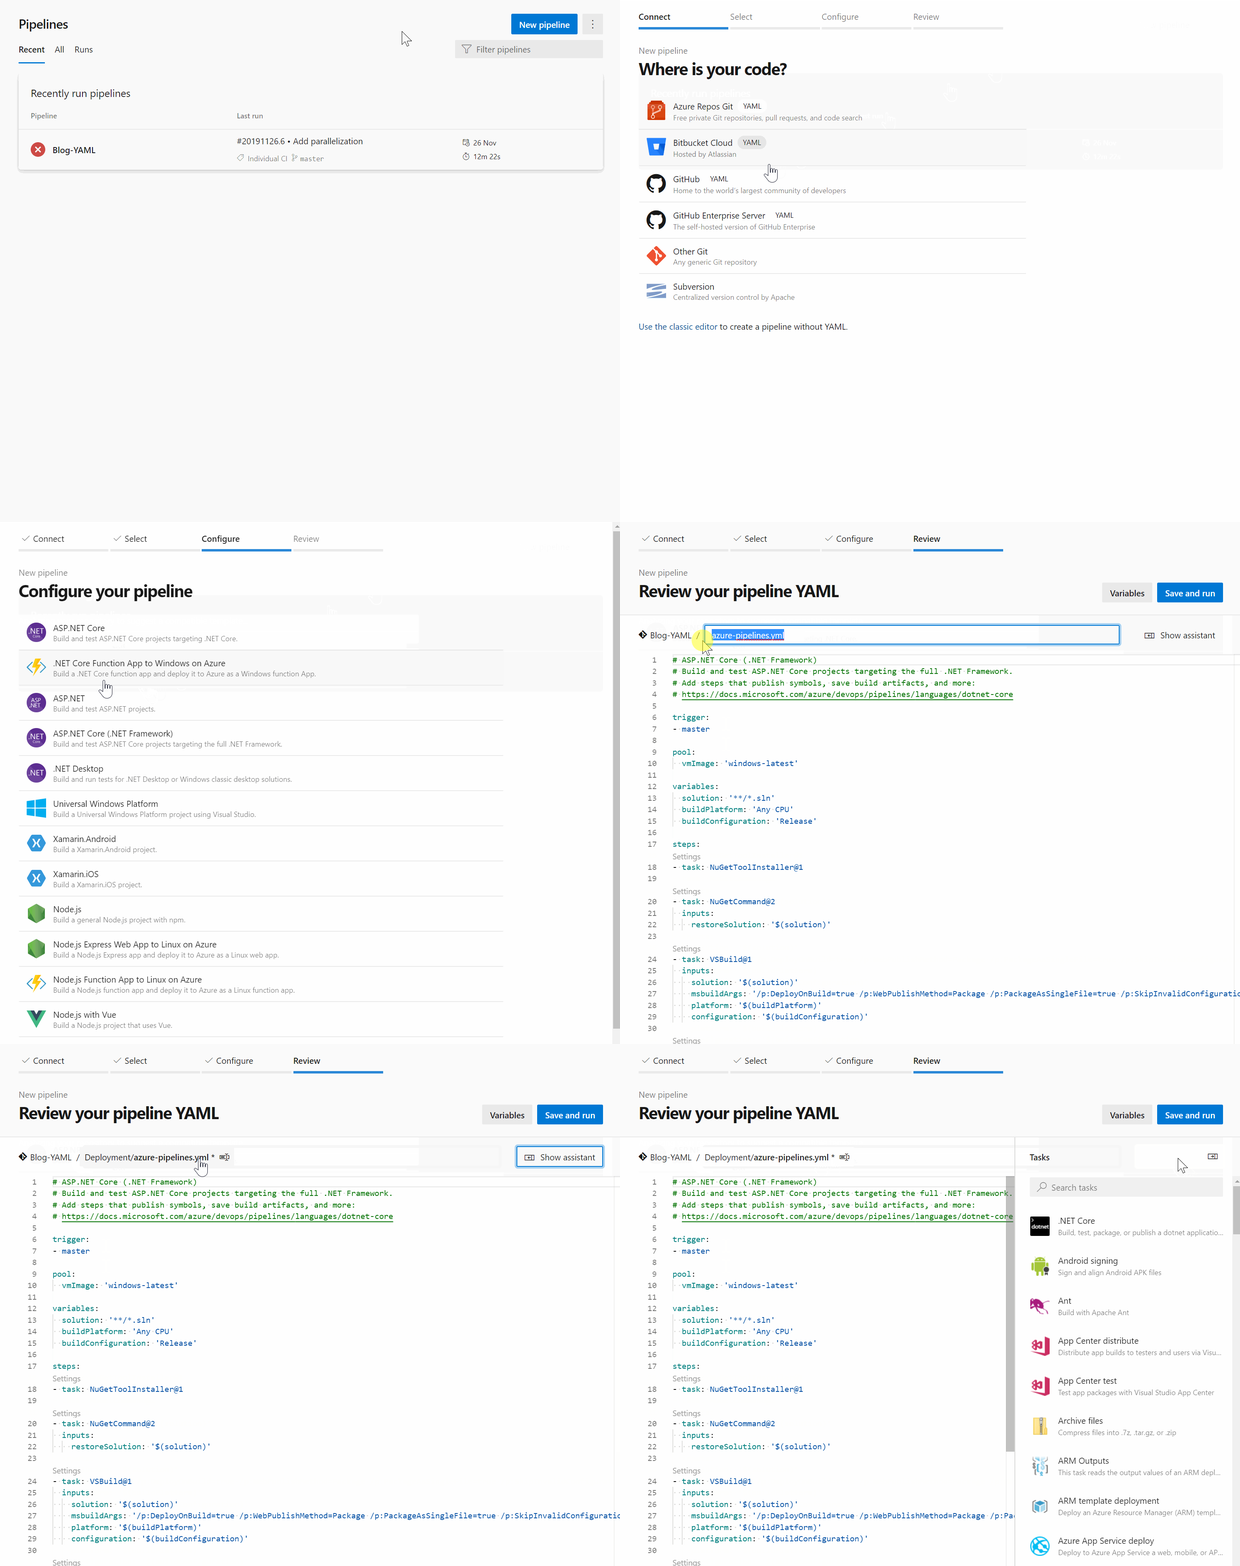
I started with an ASP.NET template, as it already had most of the variables configured that I needed. The trigger was also set to run every time the master is updated. However, I used the assistant functionality to configure dotnet core CLI tasks instead of the suggested ones and specified the windows-2019 agent pool instead of the default windows-latest. In addition to this, I added display name fields so the logs would be clearer. In the end, I used the new PublishPipelineArtifact task to publish my zipped projects for a release pipeline to utilize.
Here’s the full code of my finalized pipeline:
trigger:
- master

pool:
  vmImage: 'windows-2019'

variables:
  buildConfiguration: 'Release'

steps:
- task: DotNetCoreCLI@2
  displayName: "Dotnet Restore"
  inputs:
    command: 'restore'
    projects: '**/*.csproj'
    feedsToUse: 'select'
- task: DotNetCoreCLI@2
  displayName: "Dotnet Build"
  inputs:
    command: 'build'
    projects: '**/*.csproj'
    arguments: '--no-restore --configuration $(buildConfiguration)'
- task: DotNetCoreCLI@2
  displayName: "Dotnet Publish"
  inputs:
    command: 'publish'
    publishWebProjects: true
    arguments: '-o $(Pipeline.Workspace)/publish --no-build'
- task: PublishPipelineArtifact@1
  displayName: "Publish Artifacts"
  inputs:
    targetPath: '$(Pipeline.Workspace)/publish'
    artifact: 'web'
    publishLocation: 'pipeline'
If you want to, you could also create the variables using the Variables button in the top right-hand corner. This will allow you to specify them during queue time to whatever you desire. You would still point to them in the pipeline just like any other variable, and the dialogue also gives you some more examples of usage. I tend to keep the variables in the pipeline file so that as much of the logic as possible moves with the repo.
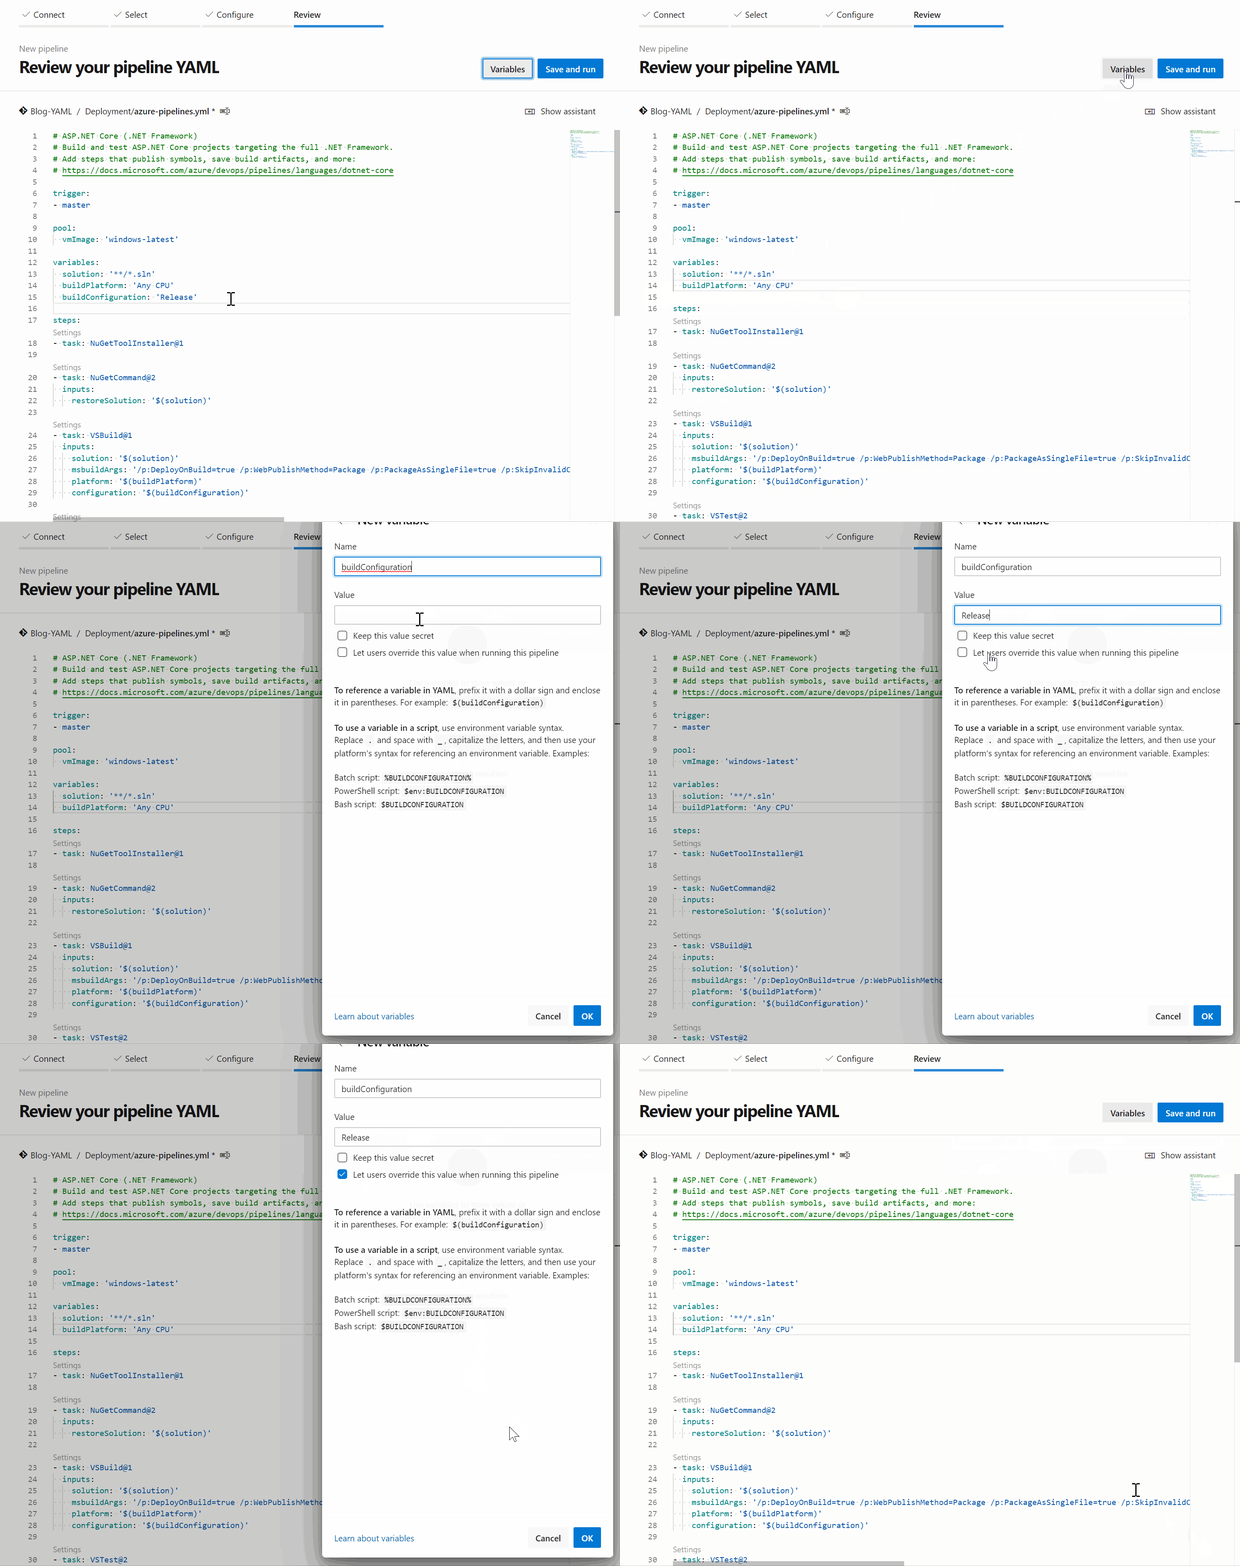
Then you are able to just save and run the pipeline while selecting whether to commit directly to the branch you selected, or to create a new branch instead. This selection depends on your git practices, though I would strongly recommend using branching and pull requests here.
Following the status of the run is just as easy as before, and provides the same amount of logging.
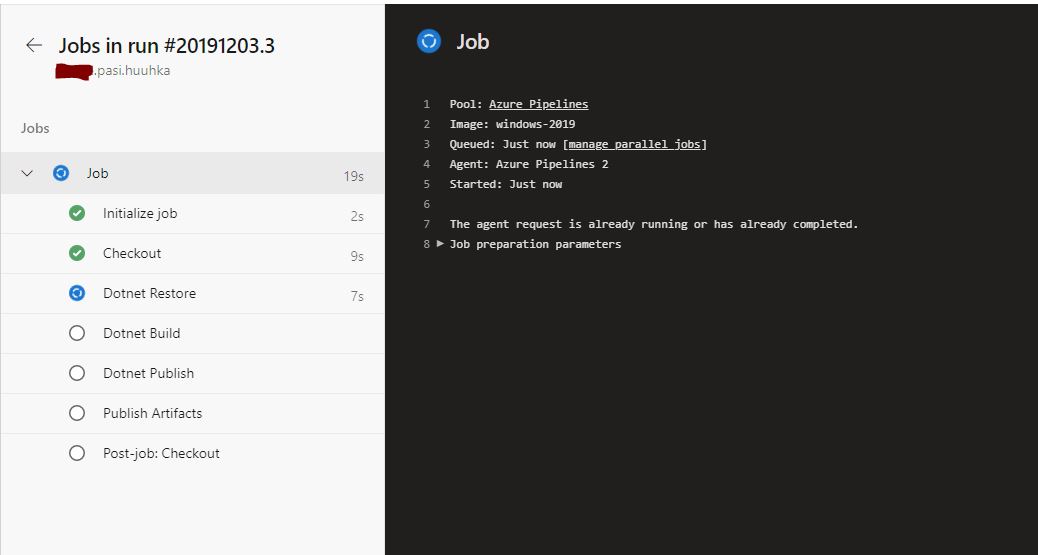
While the previous example is very simple and only includes the very basics, it gives a decent place to start building your own pipelines.
In case you already have readymade pipelines, the easiest way to convert them to YAML is to use the View Yaml-button found in each Job in build templates, and each individual task in all Classic templates. The Job-level button is especially useful as it gives the ability to convert almost the whole build pipeline with very little work required.
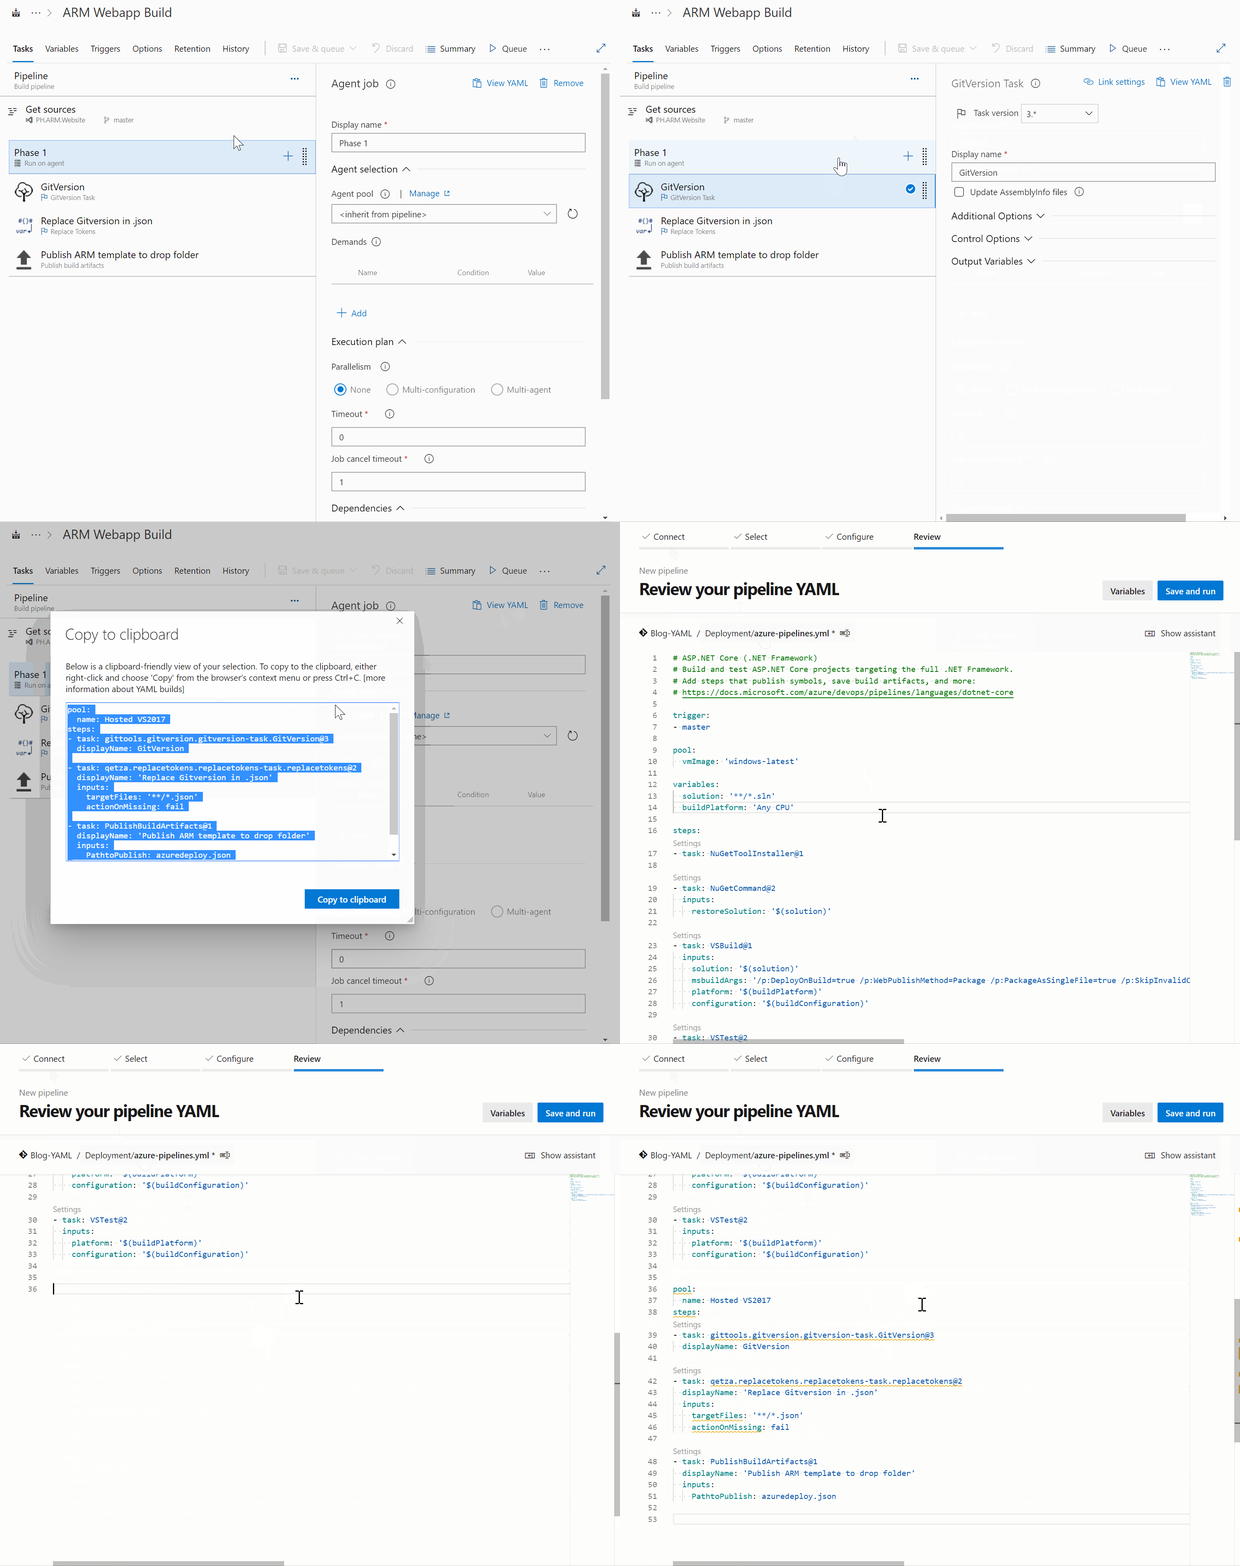
In case you are yearning to learn more, here are some features you should take a look at. They will pop up in most of the more complicated pipelines you will be creating. Especially once you start meddling in multi-stage templates and doing releases:

Our newsletters contain stuff our crew is interested in: the articles we read, Azure news, Zure job opportunities, and so forth.
Please let us know what kind of content you are most interested about. Thank you!